Upgrading or replacing a motherboard can be an exciting endeavor for tech enthusiasts, promising improved performance and enhanced capabilities for your computer system. However, this process often raises a critical question: Do you have to reinstall Windows with a new motherboard? The motherboard serves as the backbone of your PC, connecting and coordinating all its components. Therefore, when you make changes to this critical component, it can significantly impact your Windows operating system’s functionality and stability. In this article, we’ll delve into the intricacies of motherboard upgrades, the role of Windows in your system, and the factors that determine whether or not you’ll need to reinstall Windows when making this hardware change.
Do You Have To Reinstall Windows With A New Motherboard?
In most cases, yes. When replacing a motherboard, you often need to reinstall Windows. The new motherboard may have different chipsets and drivers, causing compatibility issues. While there are ways to avoid a full reinstallation, a clean install is usually recommended to ensure system stability and optimal performance. Backing up data and preparing for the process is crucial to minimize data loss during the transition.
Understanding Motherboard Upgrades
Upgrading or replacing a motherboard is a significant decision for computer users, as it can bring about various benefits and challenges. To make informed choices, it’s crucial to understand the role of the motherboard in your computer system and the reasons behind such an upgrade.
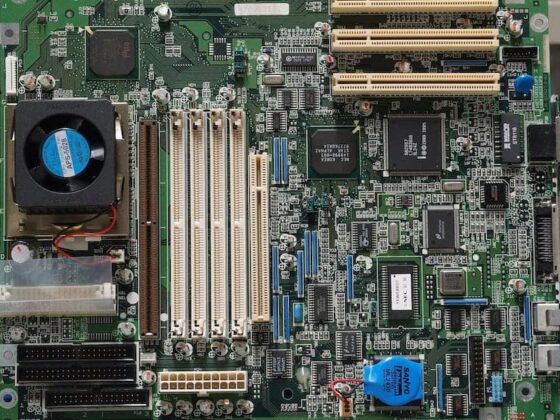
A motherboard, often referred to as the mainboard, serves as the central hub connecting various components within a computer. It provides the interface for the CPU, RAM, storage drives, graphics card, and other essential hardware to communicate and function as a cohesive unit. Essentially, the motherboard is the backbone of your PC, dictating its compatibility and performance capabilities.
There are several compelling reasons for considering a motherboard upgrade or replacement: Modern motherboards often offer better features and faster connectivity options, enabling you to take full advantage of the latest hardware advancements.
As you seek to upgrade other components like the CPU or RAM, you may encounter compatibility problems with your existing motherboard, necessitating an upgrade. In the unfortunate event of a motherboard failure, replacement becomes imperative to restore your computer’s functionality.
Gamers frequently upgrade their motherboards to support newer graphics cards and processors for a better gaming experience. Users engaged in demanding tasks such as video editing or 3D rendering may upgrade to motherboards with enhanced processing power and multiple PCIe slots. Computer enthusiasts who enjoy building and customizing their systems often undertake motherboard upgrades as part of their ongoing projects.
Factors Determining The Need For Reinstalling Windows
When it comes to replacing or upgrading your motherboard, whether or not you need to reinstall Windows is not always straightforward. Several critical factors influence this decision, including hardware changes, compatibility, activation, and potential data loss. Here’s a closer look at these factors:
1. Hardware Changes And Windows:
- Differences In Motherboard Chipsets: If the new motherboard uses a different chipset than the old one, Windows may struggle to adapt. Chipsets play a crucial role in handling various hardware components, so a mismatch can lead to instability and incompatibility.
- CPU Architecture Changes: Upgrading to a new motherboard may also involve switching to a different CPU architecture (e.g., from Intel to AMD or vice versa). This change can create driver and compatibility issues.
2. Compatibility And Driver Issues:
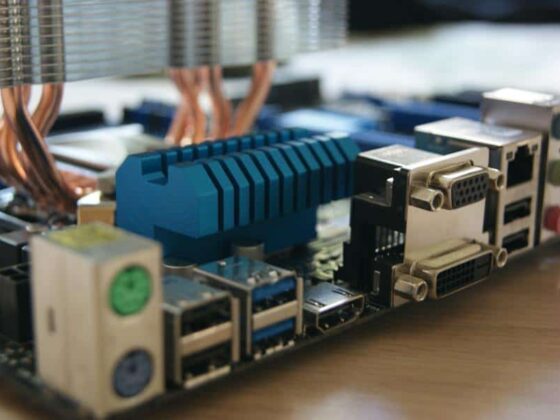
- Peripheral Devices: New motherboards may have updated or different ports, slots, or features. Ensuring that your existing peripherals (graphics cards, network adapters, etc.) are compatible with the new motherboard is essential. Incompatible hardware can result in system crashes or performance problems.
- Drivers: The motherboard drivers installed on your existing Windows installation may not be compatible with the new hardware. Proper driver support is critical for stable system operation.
3. Activation And Licensing Concerns:
- Windows Activation: A significant concern is Windows activation. Changes to your system’s hardware, including the motherboard, can trigger the need for reactivation. You may need to contact Microsoft or use an existing product key to reactivate Windows.
- OEM Licenses: If your copy of Windows is tied to the original motherboard (common with OEM licenses), replacing the motherboard may necessitate purchasing a new Windows license.
4. Potential Data Loss And Backup Strategies:
- Data Preservation: When reinstalling Windows, there’s a risk of data loss, particularly if you’re not adequately prepared. Critical data, personal files, and applications may need to be backed up to ensure nothing is lost during the transition.
- Backup Solutions: Implementing a thorough backup strategy is essential. This involves creating backups of important files, system settings, and, ideally, a full system image to expedite recovery if problems arise.
How To Reinstall Windows With A New Motherboard?
When replacing your motherboard, reinstalling Windows is often necessary to ensure system stability and compatibility. Here’s a step-by-step guide on how to reinstall Windows with a new motherboard:
1. Backup Your Data: Before starting, back up all your essential data, documents, settings, and files to an external drive or cloud storage. This step is crucial to prevent data loss during the reinstall.
2. Gather Installation Media: Obtain a bootable Windows installation media. You can create one using the Media Creation Tool from Microsoft’s website on another computer. Ensure it matches the Windows version and edition you intend to install.
3. Boot From Installation Media: Insert the installation USB or DVD into your computer. Restart your computer and boot from the installation media. You might need to change the boot order in the BIOS/UEFI settings to prioritize the installation media.
4. Begin The Windows Installation: Follow the on-screen instructions to initiate the Windows installation. Select your language, time, currency, and keyboard preferences. Click “Install Now.”
5. Enter Your Product Key: Enter your Windows product key when prompted. This step is essential for activation.
6. Accept License Terms: Read and accept the Microsoft Software License Terms.
7. Choose Custom Installation (Advanced): Select “Custom: Install Windows only (advanced)” to perform a clean installation.
8. Partition Management: Delete any existing partitions on your system drive where Windows is installed. This step will erase all data on that drive. Create a new partition for the fresh Windows installation. Usually, you can select the unallocated space and click “Next” to create a partition automatically.
9. Install Windows: Select the newly created partition and click “Next” to start the Windows installation process. Windows will copy files, expand them, and install features and updates.
10. Set Up Windows: Follow the on-screen prompts to customize your Windows settings, including region, keyboard layout, and user accounts. Connect to a network to allow Windows to download updates and drivers during installation.
11. Install Motherboard Drivers: Once Windows is installed, you will need to install drivers specific to your new motherboard. These drivers are typically provided on a CD/DVD that comes with the motherboard or can be downloaded from the motherboard manufacturer’s website.
12. Restore Backed-Up Data: After installing motherboard drivers and completing Windows setup, restore your backed-up data and files from your external drive or cloud storage.
13. Windows Activation: Check Windows activation status. If needed, activate Windows using your product key.
14. Windows Updates: Ensure that Windows is up to date by downloading and installing all available updates through Windows Update.
Conclusion
In conclusion, reinstalling Windows when upgrading to a new motherboard is a critical step to ensure the stability and compatibility of your computer system. While it may seem like a daunting task, proper preparation, including data backup and driver installation, can make the process smoother. The key considerations, such as hardware changes, compatibility, and activation, underscore the importance of this procedure. By following the outlined steps and adhering to best practices, you can navigate this transition successfully, ultimately optimizing your system’s performance and functionality.
FAQ’s
Do I Have To Reinstall Windows When Upgrading My Motherboard?
In most cases, yes, it’s recommended to reinstall Windows when changing the motherboard to ensure compatibility and stability.
Can I Avoid Reinstalling Windows With A New Motherboard?
While possible, it’s not advisable. A clean installation is usually the best way to avoid potential issues.
What Happens If I Don’t Reinstall Windows After A Motherboard Upgrade?
Your system may experience stability problems, driver conflicts, and activation issues, leading to suboptimal performance.
How Can I Preserve My Data During A Motherboard Replacement?
Back up all important data to an external drive or cloud storage before starting the replacement process.
What Should I Do If I Encounter Activation Issues After Reinstalling Windows?
Contact Microsoft support or use your product key to reactivate Windows. Ensure it matches your new hardware configuration.